QuickBooks POS Integration Setup
Quickbooks POS Integration
The QuickBooks POS extension for WooCoomerce automatically syncs your orders, inventory on-hand and pricing between your QuickBooks POS software and your WooCommerce shop. With just a few quick steps, you can setup a full integration that will send your orders and customers to QuickBooks POS. You can establish an inventory sync as well that will sync your pricing and on-hand counts from QuickBooks POS with WooCommerce. Imagine the time and money saved and reduction in entry errors when you don’t have to manually key orders into QBPOS or update inventory counts on your website.
The Setup
Setting up the extension is a snap, but there are a few things that you should make sure you have ready before you begin:
- QuickBooks POS – version 8, 9 or 10. *If you are using v10, make sure it is NOT the FREE version. This version does not support the QuickBooks POS API.
- QuickBooks WebConnector
- SSL enabled site url – QuickBooks POS requires an ssl certificate to communicate with your website. Contact your host provider to find out if you have an ssl certificate installed or how to get one if you don’t. A shared ssl will work fine.
Installing the Plugin
Once you’ve got those things ready, just upload the extension through the wordpress plugin manage and install. If you’re ready to get started using QBPOS, activate the plugin as well. Once you activate the plugin, you should now see a new submenu item in your WooCommerce menu called Quickbooks POS – fig 1.
Once you’ve got the plugin installed and can see the Quickbooks POS menu item listed under the WooCoommerce menu, go ahead and click Quickbooks POS to begin the setup. Once you click the link, you’ll be taken to the Quickbooks setup page. Here you’ll be able to:
- Generate your webconnector file
- Setup your QuickBooks mappings
- Setup your product syncs
Generating The WebConnector File
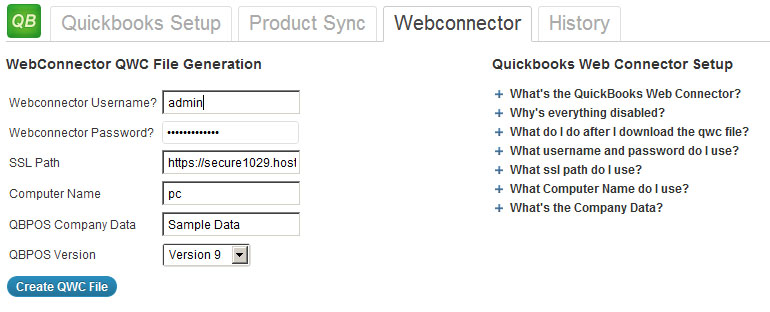
When you first go to the setup page, everything on the page should be disabled – Don’t Worry, this is by design. Click the ”Generate Webconnector File button at the top of the page.
After you click the button above, you should see the following:
The username is NOT the username for your WordPress admin section, nor is it the username for your QuickBooks POS. It’s a username that will be used by the webconnector. You can make the username whatever you want it to be.
The password is NOT the password for your WordPress admin section, nor is it the password for your QuickBooks POS. You need to make up a new password for the webconnector. You’ll need to remember this password to enter it later into the webconnector.
The SSL path is the https:// url for your site. This is required and should be for the root of your WordPress install if this differs from the root of your website. For example if your url is http://<yourdomain_name>.com, your ssl path would be http://<yourdomain_name>.com if you have your own ssl certificate. If your wordpress site is installed below the root of your website, lets say at http://<yourdomain_name>.com/woocommerce, then the ssl path you’d enter would be https://<yourdomain_name>.com/woocommerce. Again, this only applies if you your own ssl certificate. You can use a shared ssl certificate, but if you don’t know what the path for your site is on a shared ssl certificate, you’ll definitely want to contact your hosting provider to find out, because it won’t follow the same pattern for your own certificate.
The Computer Name is the name of the PC that will be running QBPOS and the Web Connector. You can find this by going to your Windows Control Panel and clicking the System icon. This should have the computer name listed on it.
The Company Data is the name of the QuickBooks POS company data file. This can be found by looking at the top of your QuickBooks POS program in the blue bar in the upper left-hand corner of your program.
The Version Number is the version of QuickBooks POS that you are using. Right now it’ll support version 8, 9, and 10. Version 6 and 7 MAY be supported in the future.
After you fill in those fields, click the Create QWC File button and the file download will start. You’ll want to keep track of the qwc file because you’ll use it next to establish the connection between QuickBooks and your website.
Loading the QWC File
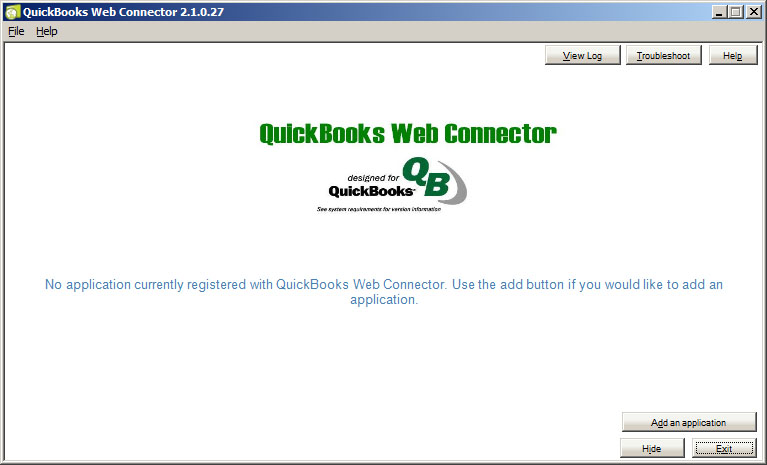
Remember when we said to make sure you had the QuickBooks WebConnector installed on your computer? Go ahead and open that program now. The WebConnector ships with QuickBooks and should be found in the same folder as your QuickBooks installation. Go ahead and start the webconnector. It should look like this:
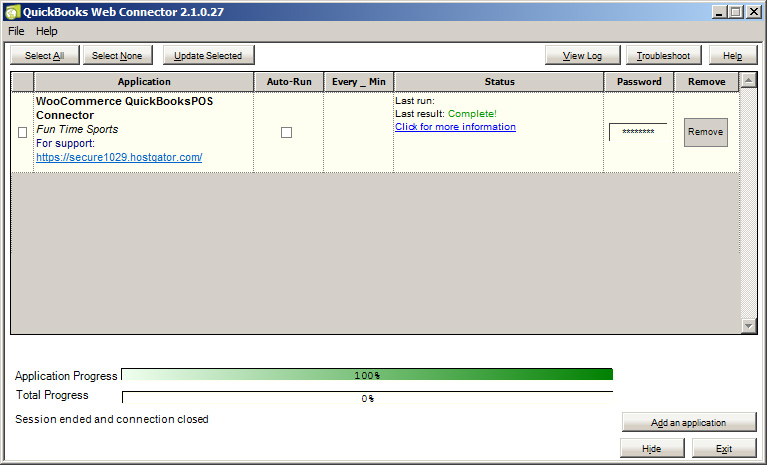
Once you’ve got it running and your QuickBooks company file open and running as well, go ahead and click the Add an application button in the WebConnector. This will bring up a standard windows file dialog. Select the qwc file that you downloaded from the previous step, which will load your website into the Web Connector. When you load the qwc file, QuickBooks will prompt you to allow access to the company file for your website. Answer yes to all of the options. Once connected, the Web Connector should look something like this:
The Webconnector will most likely prompt a box that lists the QBPOS server to connect to. This is only for the initial setup, after that, it should login automatically. If the web connector closes when you try to us the “Add an Application” button to load the qwc file, just restart the web connector and double-click the qwc file which will load it as well.
Quickbooks <->WooCommerce Mappings
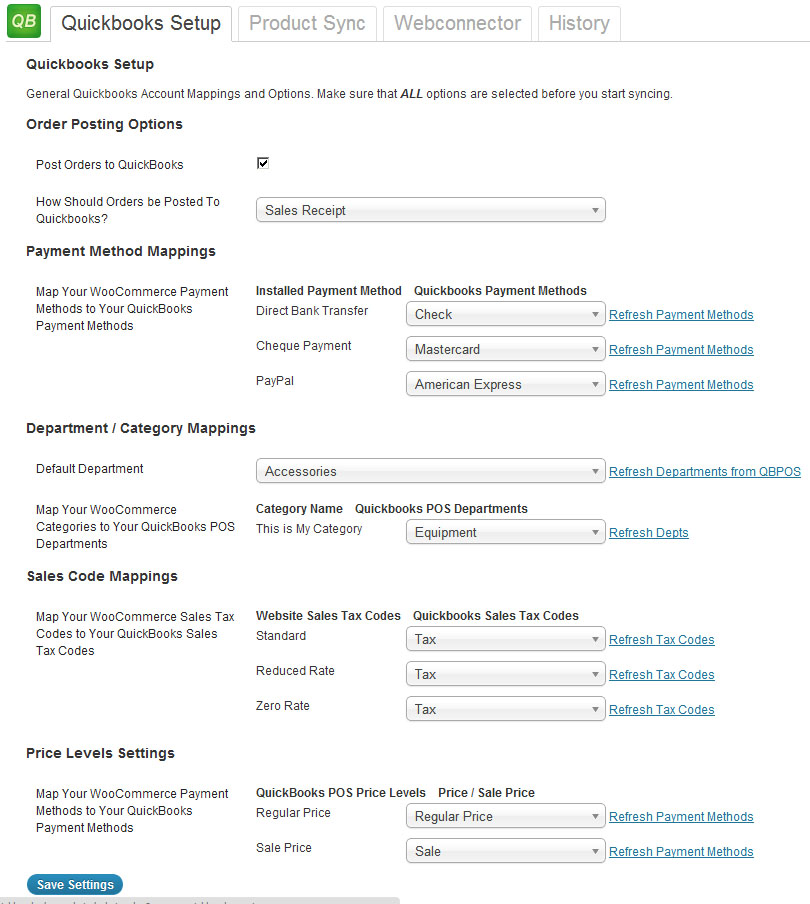
Now that you’ve got the connection between POS and your WooCommerce shop established, you should be able to go into the QuickBooks Setup tab and map all of your QuickBooks settings to the correct WooCommerce settings. All of the dropdowns should be populated with your POS settings.
If you’re using POS and have a company file setup, most of these settings should be self explanatory to you.
Product Sync Setup
Using the Extension
Once you have the extension setup and verified that it’s working correctly, there really isn’t anything that you need to do for maintenance. Once you receive new inventory into POS and those items have been synced, the count will be updated on your website the next time the inventory sync runs. Likewise, if you so choose, pricing for products will be maintained from POS as well. Another really cool thing that you can do with pricing, is establish a “Website” pricing in your POS and manage two different price structures for your business – one for brick-and-mortar and one for online.
Similarly, once any order achieves completed status, it will automatically post to POS and you will be able to see it’s status in the order grid and the order details page. Sending orders and syncing inventory is a hands-off process meaning you can spend more time focusing on your business and less time making sure your website is up-to-date and all of the orders have been entered.


